Wednesday, May 31, 2017

Challenge Winners

Today we are happy to announce the challenge winners for both March and April!

Each week our Design Team provides you with three challenges to help you get your creative juices flowing. Pocket Life Sketch Friday gives you sketches to use in your pocket style scrapbooking. Saturday's 3 to Inspire challenge brings you three creative prompts to incorporate on a project of your choice. On Sunday, our Sunday Sketch challenge goes live.

To participate in either or all challenges, all you need to do is upload your project to the gallery within a week of the challenge date, noting the date of the challenge in the title of your project. One winner is picked for each challenge and announced here on the blog.

Thanks to all that participated during the months of March and April! Here are the winners:

Sunday Sketch: $5 Gift Certificate to the CTK Store
     3/5: jinnynewlin  3/12: barbp  3/19: barbp  3/26: stefcia
     4/2: mamakven 4/9: sandyr  4/16: barbp  4/23: deshetrick3  4/30: barbp
 
3 to Inspire: A small prize from the CTK Store
     3/25: mamkven
     4/1: mamakven  4/8: dbryant  4/22: jinnynewlin  4/29: malocup2

Pocket Sketch Friday: Fun Mail
     3/31: stefcia 4/14: mamakven  4/21: mamakven


**Winners: To claim your prize, please email Trina at citrustwistkits@yahoo.com and include the date and name of the challenge that you have won in the subject line./

Tuesday, May 30, 2017

Tuesday Tutorial - 5 Journaling Ideas for your memory keeping

Documenting memories is a beautiful mix of words and images. In our albums and layouts we mix journaling and photos - they make our memories alive and protect them from fading. Just few words jotted down next to a picture make it more vivid and true, a date in the corner reminds when the event took place, a short story makes the photo real.

przepis na project life2


It’s important not to forget the words when it comes to memory keeping - after all, they tell the story! If you feel uninspired and would like to find some new, creative ways that will help to spice up your journaling here you are - I have 5 ways for creative journaling for you!


album-project-life-dokumentowanie-wspomnien-kwiecien-2017-worqshop

1. USE STICKERS TO TELL YOUR STORY
Small, colorful stickers with words on them are so much fun! You can use them in so many ways, also as a tool to support your journaling! Sometimes I like to use only a single word sticker to capture a mood or memory shown in the picture. On some spreads I play with the stickers and try to create a catchy title for my photo or few lines of simple journaling. I love the final effect!


project-life-czerwiec-tydz23
2. MAKE A LIST!
You don’t have to always write your journaling in a story format. To mix things up a bit I love writing lists! A list can deliver so much information in condensed format - what you love, what you do, what you are working on, what your plans are. Experiment with lists, they can be super creative way to boost up your journaling!

project-life-wyprawa-na-podlasie-worqshop


3. ASK SOMEONE ELSE TO SHARE THEIR POINT OF VIEW
When you start documenting memories it’s natural that all the stories are told from your point of view. It’s great, but why not try asking someone else for help? Every now and than ask your partner to write a line or two in your album. Challenge your kid (I bet they will love it!) to write about your adventures. Ask for help, ask for opinions, ask for another person’s perspective - make them feel that they are part of the album too!

album-project-life-kwiecień-tydzień-17-kompozycja-ze-stempli

4. PLAY WITH STAMPS
Stamps are for sure one of my favorite scrapbooking gadgets! They can be used over and over again in so many different ways! The little stamps that come with Citrus Twist Kits are particularly great for journaling - look at all the phrases and sayings! You can use them as tiny word stickers (or create your own “stamped” stickers on the scraps of paper!), stamp them on photos or cards, choose one word or build phrases - so many possibilities for creative journaling!

worqshop-project-life-dokumentowanie-wspomnien


5. USE A PROMPT
If you feel bored and uninspired try to use a journaling prompt that would spark some creativity! You can find plenty of them on Pinterest. The journaling prompts might help you to look at subject of your photo or layout from different angle, very often they offer a fresh and unique perspective to storytelling!


What are your favorite ways to journal in your albums? How do you introduce journaling on the layouts? Let us know in the comments!

Monday, May 29, 2017

Seize The Day

Good morning! Welcome back to the blog. It's Claudia here with you and today I'm sharing a layout I created with the gorgeous May kits. For this particular layout I'm using the Main and Sprinkles kits.

I've been trying to 'challenge' myself to use more patterned paper for my background so I decided to use this lovely paper from the Pinkfresh Studio Live More collection which comes in this month's Main kit. I also cut a piece of white cardstock (about 6"x12") to put in the middle of the layout. I decided that that is where I wanted my photo and the embellishments to go.


For the color scheme I decided to mostly go with colors featured in the background paper with a few hints of mint/teal added to it.  


I'm in love with these puffy stickers from the Maggie Holmes Chasing Dreams collection and this floral one had the perfect color to match with the color scheme I'm using for this layout. 

 
At first I wasn't sure if I was going to like the rose gold foiling since I am obsessed with regular gold but I must admit that I ended up really loving the way it looked. It's definitely a nice change. I really enjoy these alphas that come in the Sprinkles kit so I made sure to use them for a (partial) title.


Because the photo is in black and white I thought it would be nice to add a little bit of black to the background so I pulled out my 1" circle punch and selected one of the papers from the kit that had some black on it. I then cut them in half and placed them on the layout - this frames it all together quite nicely.

There's also a process video up on my Youtube channel;


Thank you for joining me today, I hope you enjoyed seeing this layout and that you feel inspired to create yourself. Have a wonderful day! :-)

Sunday, May 28, 2017

Sunday Sketch with Lilith

Hello. I hope you are all having a wonderful Sunday. Today I am sharing the Sunday sketch with you. I used the May Brighton kit and the add on kit to create my layout. There are so many products to choose from that I didn't know where to start but I quickly picked a color combo based on the Die cuts from Shimelle's collection.

Here is a look at the sketch:
Instead of using two photos I used one photo and a card which I cut out of one of the patterned papers from Shimelle Lane's collection.  I kept the placement of the title and the embellishments as well as the added detail at the top right hand corner.


I used the flower die cuts from Shimelle (Little By Little Paper Die-Cut Shapes (American Crafts)). I added a couple of Shimmer ink splatters to create flow like on the sketch.

To play along with this week's challenge, create a layout inspired by the sketch, upload it to the Citrus Twist Kits Gallery with the sketch date (5/27) in the title, and you might win a $5 gift certificate to the CTK store.  

Saturday, May 27, 2017

3 to Inspire | Gina Rodgers


Happy Saturday all..it's time for another 3 to Inspire challenge!


Each Saturday, a member of our team prepares 3 prompts to serve as starting points for a project. In order to play along with us AND be eligible for a prize, you must create a project that includes all three prompts. Here are this weeks prompts:

1. use 2 journal tags
2. use some foam tape or tabs to create dimension
3. include 2 or more wood veneer embellishments


I've used some foam squares under the flower die cut and also under a couple of the stickers in the title below. This is a great way to make something 'pop' and add dimension to your page


The wood veneer shapes and phrases are always a favourite of mine and being neutral, will go with any colours and patterns you chose to use


Now it's your turn! Simply create a project using the 3 prompts and upload to the CTK gallery with today's date [5/27] in the title for your chance to win a small prize from the CTK store. Have fun!

Gina x
SaveSaveSaveSave

3 To Inspire - Two Ways!


Happy Saturday! It's Tara and Andrea here with you sharing our twist on '3 To Inspire' today. We have a couple layouts to share as well as a double challenge! Andrea joined in along for the fun  and we gave each other a recipe challenge. Join us and try out our recipe challenge!

Here is Andrea and her take on the recipe I gave her.


Tara challenged me to do a layout with: 

1. monochromatic or two-toned color scheme
2. puffy stickers
3. multiple photos

This was her “recipe” for me and I loved it! It was such a cool challenge! I don't know if I have ever done a page where I limited the number of colors that could be used like that and it actually helped to push me out of my box and I think it came out so cute! I love the pinks and greens in my layout! I also don't think I have ever used so many puffy stickers on a layout so that was a cool creative push too!


I really had fun using the May “Brighton” for this challenge! It was cool to pull together all the things from it that I thought would work and then just proceed creatively from that point. You are limiting yourself on what you can use from a kit (which is already like a creative limit of things to use from your scrapbook stash), but it actually opens up all these new ideas and possibilities! That is the point of a challenge like this, it really helps you to be even more creative and to try new things!


Often when we scrapbook, especially if we have been doing it for a long time, which I have, we can get caught in the same habits when it comes to making a layout. I know there are certain ideas, styles, products, formats, etc, that have become favorites of mine, that I tend to repeat. And so I always try to do new challenges like this every so often to make sure that I don't fall into a subconscious loop of creativity. I suggest you challenge yourself every so often too so that you mix things up and stay fresh! And it definitely helps even more to have someone create a “recipe” like this for you (instead of picking a challenge recipe for yourself, although that can be helpful too). Someone else might be able to better see what your tendencies are and think of some new ways for you to switch things up a bit!


I had so much fun with this challenge! Working with Tara was excellent! She is very sweet and supportive!
--------------------------------------------------------------------------------------------------------------------------

Here is the recipe Andrea gave me to work with:
1. doodling or brush-script
2. use a paperclip
3. layering pretty patterned paper


I loved the challenge Andrea gave me! I really wanted to take advantage of the fun exclusive 6x6 papers that were in the Brighton Pocket Life kit this month. I started off with a layer of vellum under my photo from my stash and my favorite paper was the blue colorful paper I used on the right side with the floral doily print.


I made a little layered cluster at the bottom of the page. The colors in the kits this month are fun and bright!  I used a label stamp to create the purple label beneath the "be fearless" die cut. I cut off the black and white striped border from one of the 4x6 journaling cards to use as another layer.


I added in a plastic paper clip from my stash to add even more layering. I love using little strips of papers to make the kit go a long way. The polka dot paper is the packaging included with the puffy stickers!


I decided to make my own journaling card using a brush script phrase I wrote out. I absolutely loved the bird houses on the wall so I went with that theme for some fun. I liked keeping the color scheme minimal and bold with black lettering on a white background.


I really love how this layering came together. 


Now it's your turn! To play along with this week's 3 to Inspire Challenge, create a project incorporating all three of the prompts from one of our challenge recipes, post it to our gallery with today's date (5/27) in the title, and you will be eligible to win some happy mail from the CTK Store!

Friday, May 26, 2017

Pocket Life Sketch Friday with Mira

Hi there!

Are You ready for some weekend scrapping? Cause I'm here today with some sketches and inspiration to get You in the creative mood!

I have three sketches for You this week:
Here's my page made with the third sketch:


And the two more pages - also based on today's sketches - You might have already seen in my previous post:


I really hope You'll use one of my sketches it in Your albums! Remember: You have a chance to win a price from Citrus Twist Kits when You create a page according to one of my sketches. All You have to do is: Create a layout based on the sketch of Your choice, post your layout to our Gallery or our Facebook Fan Page by Friday, June 2nd and be sure to include PL 06/02 in the title.

Have a great weekend!

Thursday, May 25, 2017

"Tale As Old as Time" Layout: using ephemera to document a movie! with Andrea

Hi everyone! It's 
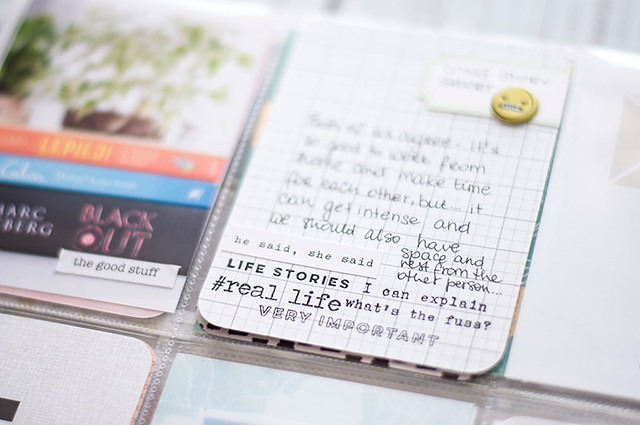
Andrea here. Today I wanted to share with you a movie layout I made using the Citrus Twist May "Brighton" kit. It is a layout about my date night with my hubby to go see the new live action "Beauty and the Beast" in the theater recently. I don't know about you, but I love to scrapbook about my movie nights and when I do, I like to use ephemera. So today, let's talk about what the different kinds of ephemera and how to use it (particularly for layouts where you are documenting something like a movie date, or a trip, or some other outing).


So there are three kinds of ephemera -- 1) the kind from a collection that you buy from a scrapbook company you like, which is like "faux ephemera" because it has been made for you so as to give an "ephemera" look, but be cutesy and match your scrapbook supplies. 2) There is the kind that you collect, which I call "collectible ephemera", which you can collect at any time. I have a lot of vintage ephemera and Disney ephemera that I collect from online, from trips I take, from presents from loved ones (they know I collect it), from stores, etc. This is what a lot of people refer to as "souvenirs" or  "memorabilia" and may or may not also be the third type of ephemera also. And so then 3) is "found ephemera", the kind that you find when you are on the go, on a vacation, on a dinner date, at a theme park, at a wedding, at some other event, date, outing, etc! "Found ephemera" is basically a "souvenir" that you don't have to buy. You just see some piece of paper that you like that is free from where you went to and you include it in your scrapbooking, basically. A ticket stub for a movie is a good example of this kind of ephemera. You have probably used all three of these types of ephemera at some point in your memory keeping. The found kind and the collectible kind tend to be particularly useful and popular for things like project life.


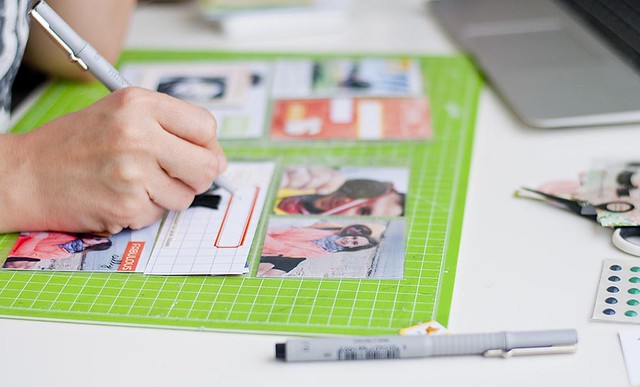
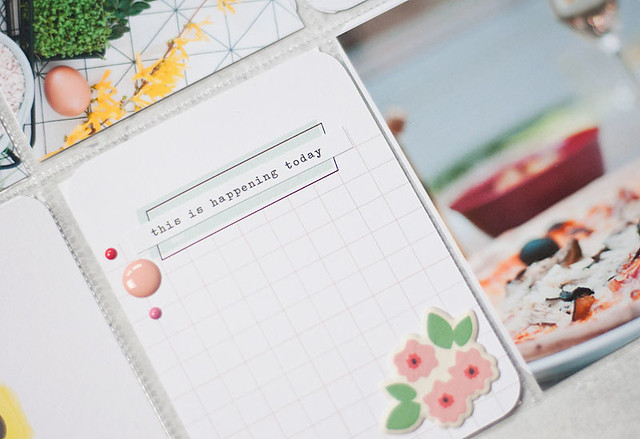
Ok, so now that we have gone over the differing types of ephemera, lets talk about using them. I love using ephemera in my scrapbooking! In this layout you can see me use all three kinds!


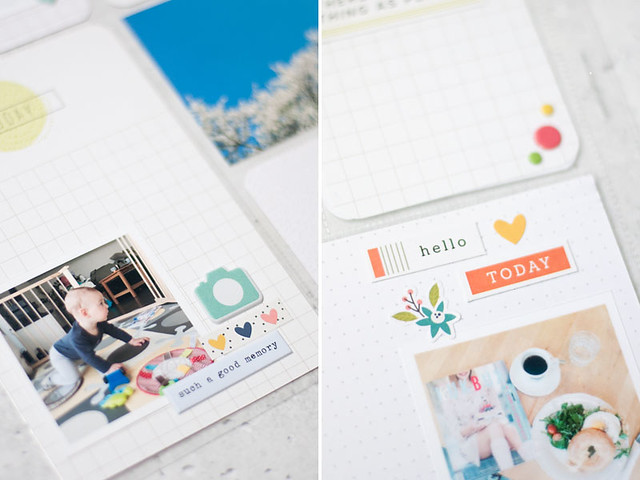
It is a layout about a night out at the movies. And movies are perfect to scrapbook with ephemera! As I noted, a movie ticket is a type of "found ephemera" and it tends to always look cute on a layout. And there are so many different things you can do with a ticket. You can use it as is, you can tear it, cut a strip from it, you can punch it into a shape! I basically did all of these things with my tickets! And I spread out the different pieces of ticket here and there around my page and used them in layering clusters. The tickets, and all "found ephemera", is awesome because it is a piece of my life on the page. It is the declaration of some activity I did, something I saw, something I enjoyed, etc. It helps to not only tell the story, but bring it to life in a very tangible way. And it also serves as a reminder to the memory keeper of what that day, event, etc, was really like.


I also used "faux ephemera" when I used the little arrow and circle and tab pieces that come in the Pinkfresh ephemera pack in the kit. I love how they look, with their little touches of rose gold! They are really for decoration. But this is an important part of your memory keeping as well. You want things to look good and "faux ephemera" can really help pull things together on your page and set a tone, style, color scheme.


And I used "collectible ephemera" as well in my layout. I printed out a promo picture for the new "Beauty and the Beast" movie. I found a few pics like this online, and simply picked out the one I thought looked best with my layout's color scheme and style. This, along with my title and subtitle, plus my journaling, really helps set the stage and tell the story. The photo I used of course, helps with this as well. But when your photo doesn't completely show what story you are trying to tell, a piece of "collectible ephemera" (which is usually an image piece of ephemera) really helps to finish telling the story of your layout to the viewer. With a quick glance at my page, I think you can tell that it is about going to see the movie "Beauty and the Beast".

It also happens to be about my hubby and I being a couple of dorks...but we wont go into that now! Lol! ;-P


Alright, well, I hope this has inspired you to go use some different types of ephemera on your layouts! Document a movie night, a vacation, a trip to Starbucks or a day at Disneyland...and see what a big difference these three kinds of ephemera can make on your page! Hugs and Happy Scrapping!! And remember to "live your life as a fairytale", as I always say!

xoxoxoxo -- Andrea


Wednesday, May 24, 2017

Traveler's Notebook spread with Veera

Hi, It's Veera here today to show you a traveler's notebook spread I created with May kits. I love this format of memory keeping of it's smaller size and also the fact that once the spread is complete it's already in "an album".

I was really inspired by the the floral pattern paper and it reminded me of Hawaii so I used a picture I took when we were there on our honeymoon. As the pattern paper is a bit busy I kept the other parts of the spread really simple.


Have you tried this form of memory keeping yet? If you haven't I courage you to do so, it's addictive!

-Veera

Tuesday, May 23, 2017

Tutorial Tuesday with Lilith

Welcome to Tutorial Tuesday with Lilith.
For this tutorial I picked one of my favorite papers from the May kit and add-on but which is for me also one of the most difficult to work with. It is such a graphic design and takes up most of the space and I didn't want to cover anything up.

Here is a look at how I went about using it.

I started by placing my photo in the white space that was left on the patterned paper and I picked out one of the die cuts from the Live More copper foiled die cuts pack from Pink Fresh Studio which came in the main kit. I put that to the left of the picture.


Then I rummaged through the die cuts and picked out a couple more that I wanted to use. I placed them in the other spots which didn't contain any designs.


I did add two die cuts to the O of MORE as I wanted to draw attention the words and the two die cuts didn't distract from the design but enhanced it.


Two arrows create flow and draw the eye towards the photo. To break up the horizontal line of the photo I added a star die cut. I also took 2 thicker numbers from the Thicker set that came in the add on and made the number 10. (My son's 10th birthday).

Here you can see the finished layout.


 Thank you so much for stopping by and happy scrapping.

Lilith